最近在做Android项目,也没有时间从头开始系统学一遍,大部分知识点只能一边做项目一遍积累。
今天在做一个需求写布局的时候在
加藤同学的建议下使用RecyclerView来实现,在编码过程中接触到LayoutInflater这玩意,也算是第一次接触吧,整理下相关知识点。
什么是LayoutInflater
LayoutInflater是一个用于将xml布局文件加载为View或者ViewGroup对象的工具,我们可以称之为**布局加载器**。
将layout的xml布局文件实例化为View类对象,LayoutInflater 的作用类似于 findViewById(),不同点是LayoutInflater是用来找layout文件夹下的xml布局文件,并且实例化!而 findViewById()是找具体某一个xml下的具体 widget控件(如:Button,TextView等)。
获取方式
LayoutInflater本身是一个抽象类,不能直接通过new的方式来获取它的实例。
上代码:
第一种方法
LayoutInflater inflater = (LayoutInflater) context.getSystemService(Context.LAYOUT_INFLATER_SERVICE);
第二种方法
LayoutInflater inflater = LayoutInflater.from(context);
第三种方法
// 在Activity内部调用getLayoutInflater()方法
这三种方式本质是相同的,从源码中可以看出:
public static LayoutInflater from(Context context) { |
在Activity内部调用getLayoutInflater方法其实调用的是PhoneWindow的mLayoutInflater:
public PhoneWindow(Context context) { |
这几个方法实际上殊途同归,都是通过调用Context的getSystemService方法去获取。
获取到的是PhoneLayoutInflater这个实现类。
public class Policy implements IPolicy { |
实例化View类对象
实例化LayoutInflater之后,就要将layout的xml布局文件实例化为View类对象。
View view=inflater.inflate(R.layout.ID, null); |
inflate方法
点击进入sdk源码,可以发现inflate方法有以下几个重载方法:
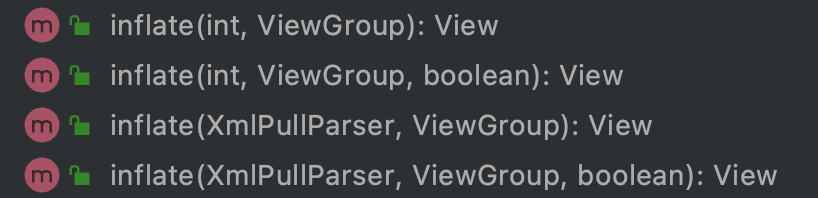
它们返回的值都是View对象。
其中 public View inflate (int resource, ViewGroup root) 最为常用。
示例代码:
LayoutInflater inflater = (LayoutInflater)getSystemService(LAYOUT_INFLATER_SERVICE); |
指定了第二个参数 ViewGroup root,当然也可以设置为 null 值。
inflate方法的参数关系
root != null, attachToRoot == true传进来的布局会被加载成为一个View并作为子View添加到root中,最终返回root;
而且这个布局根节点的android:layout_xxx参数会被解析用来设置View的大小;root == null, attachToRoot无意义当root为空时,attachToRoot无论是什么都没有意义。此时传进来的布局会被加载成为一个View并直接返回;
布局根View的android:layout_xxx属性会被忽略,即android:layout_xx属性只有依附在某个ViewGroup中才能生效;root != null, attachToRoot == false传进来的布局会被加载成为一个View并直接返回。
布局根View的android:layout_xxx属性会被解析成LayoutParams并设置在View上,此时root只用于设置布局根View的大小和位置。
加载xml布局的原理
从根节点开始,递归解析xml的每个节点。
每一步递归的过程是:通过节点名称(全类名),使用ClassLoader创建对应类的实例,也就是View,然后,将这个View添加到它的上层节点(父View)。
同时会解析对应xml节点的属性作为View的属性。每个层级的节点都会被生成一个个的View,并根据View的层级关系add到对应的直接父View(上层节点)中,最终返回一个包含了所有解析好的子View的布局根View。