使用配置中心的客户端都是直接调用配置中心的server端来获取配置文件信息。这样就存在了一个问题,客户端和服务端的耦合性太高,如果server端要做集群,客户端只能通过原始的方式来路由,server端改变IP地址的时候,客户端也需要修改配置,不符合springcloud服务治理的理念。springcloud提供了这样的解决方案,我们只需要将server端当做一个服务注册到eureka中,client端去eureka中去获取配置中心server端的服务既可。
在上一篇中,我们主要完成了:
- 构建了
config-server,连接到Git仓库 - 在
Git上创建了一个config-repo目录,用来存储配置信息 - 构建了
config-client,来获取Git中的配置信息 - 在
config-client中开启了Refresh,动态刷新配置信息
接下来,基于配置中心Git版本来进行改造。
Server端改造
POM
在pom.xml文件中添加依赖:
<dependency> |
配置文件
在application.yml中添加erueka配置:
eureka: |
启动类
给启动类加上@EnableDiscoveryClient注解,激活对配置中心的支持:
|
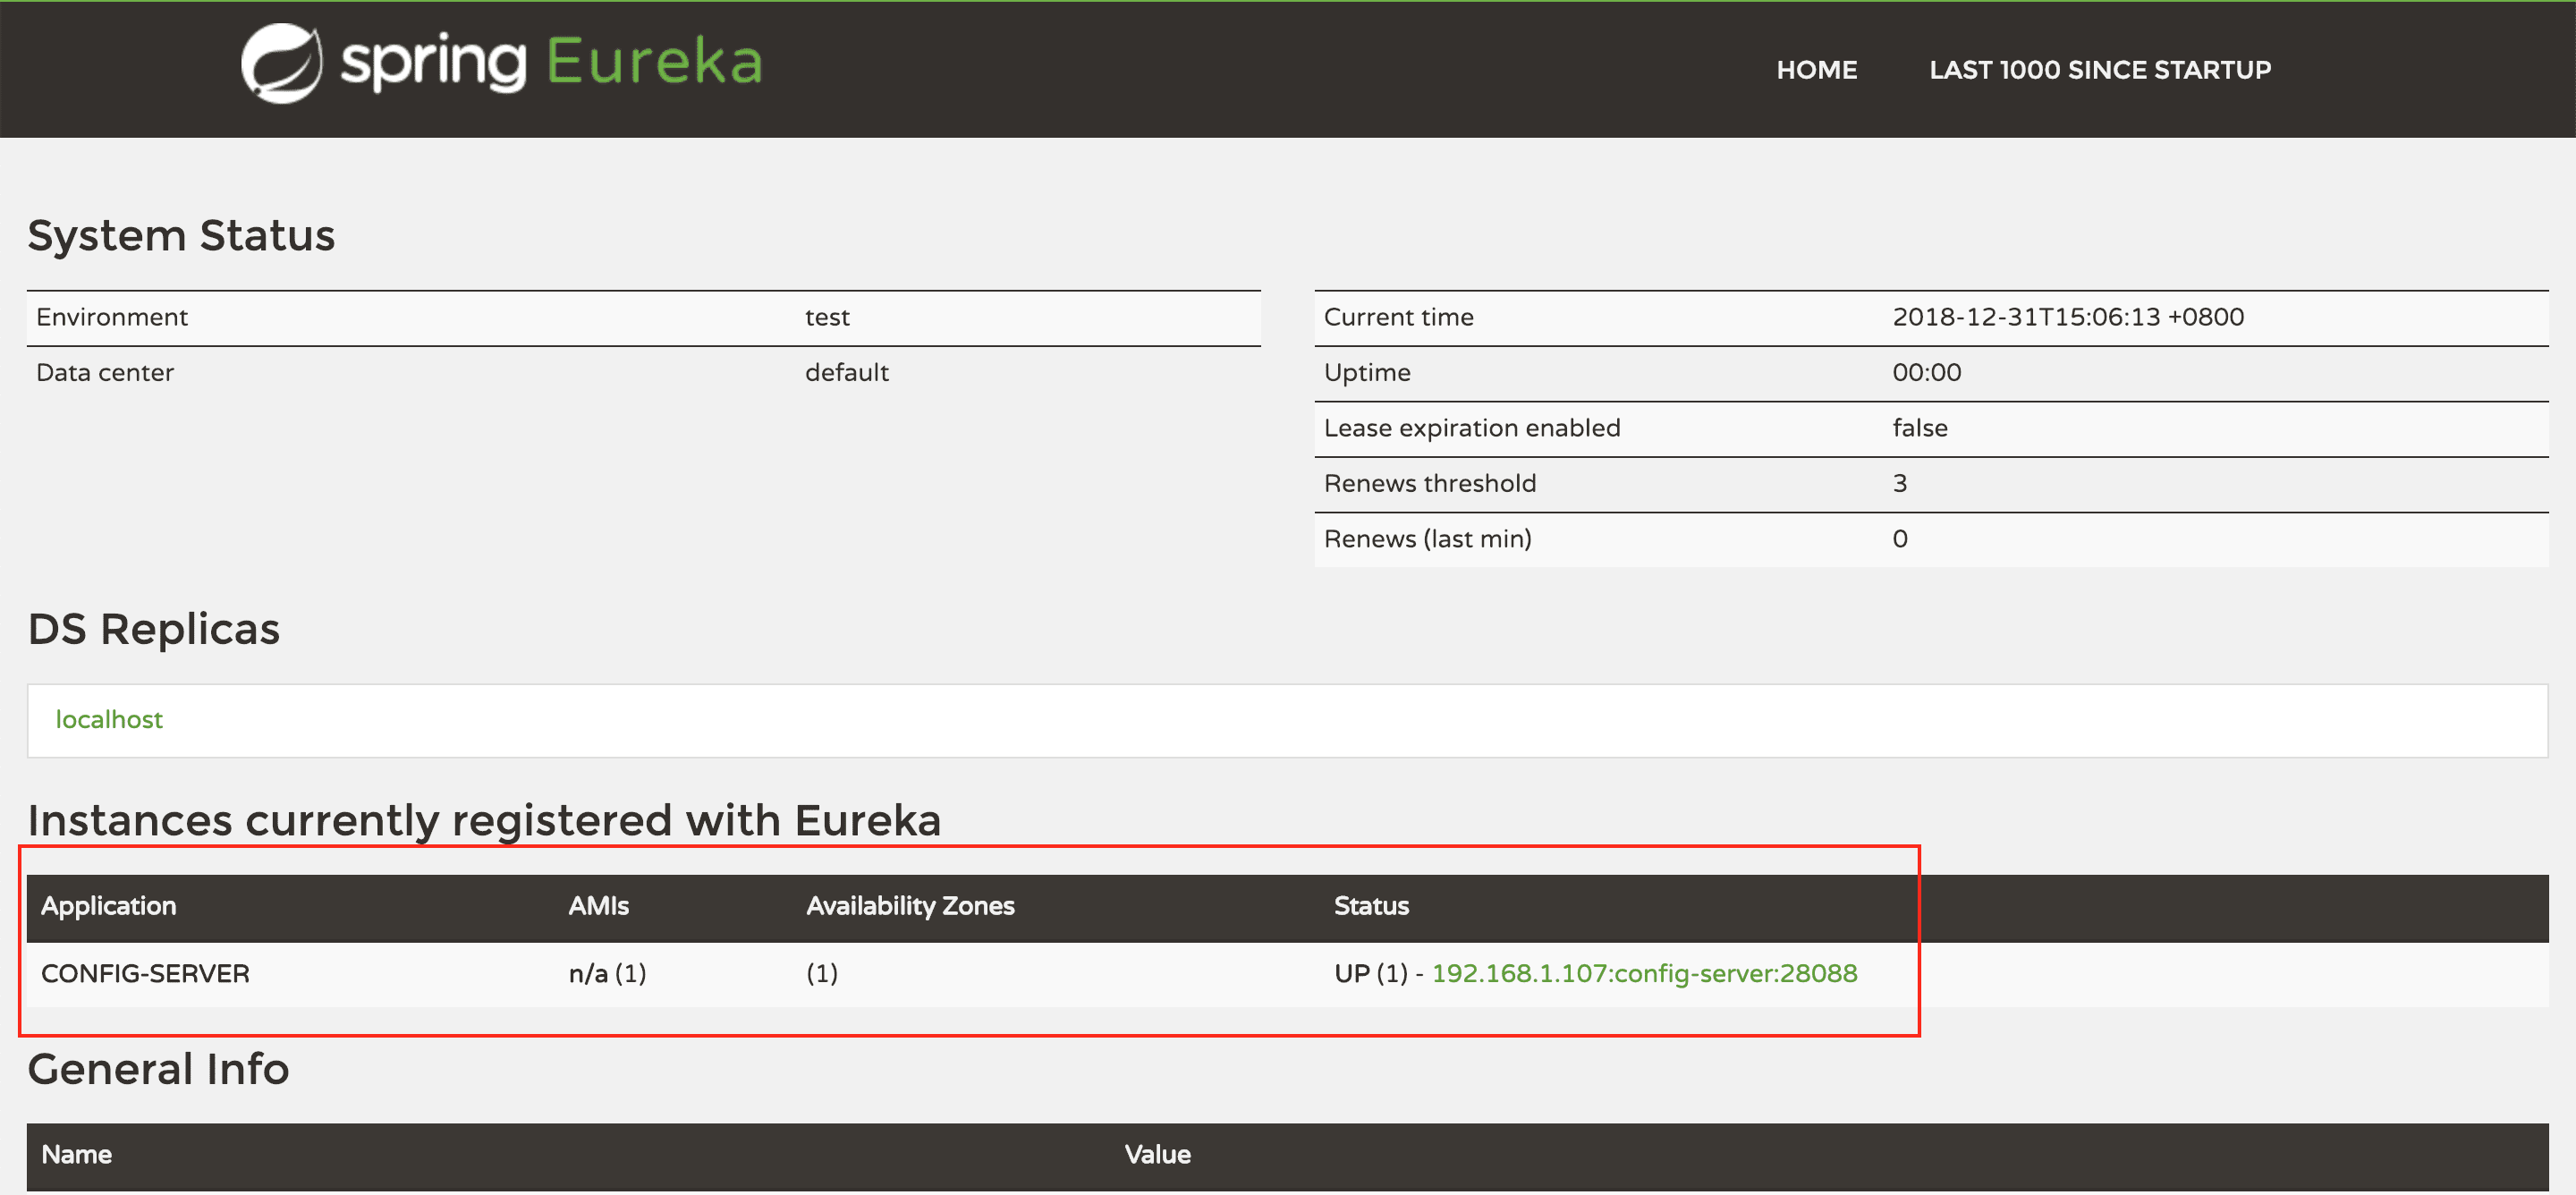
Server端改造完成,依次启动注册中心、config-server,访问http://localhost:28081,就会看到config-server已注册到注册中心。
客户端改造
POM
在pom.xml中添加依赖:
<dependency> |
bootstrap.yml
修改bootstrap.yml配置文件:
spring: |
主要是去掉了spring.cloud.config.uri直接指向 Server 端地址的配置,增加了最后的三个配置:
spring.cloud.config.discovery.enabled:开启 Config 服务发现支持spring.cloud.config.discovery.serviceId:指定 Server 端的 name, 也就是 Server 端spring.application.name的值eureka.client.service-url.defaultZone:指向配置中心的地址
这三个配置文件都需要放到bootstrap.yml的配置中。
启动类
启动类
给启动类加上@EnableDiscoveryClient注解,激活对配置中心的支持:
|
Client端也改造完成,启动Client端,访问http://localhost:28081,可以看到Client也已经注册到注册中心:

测试
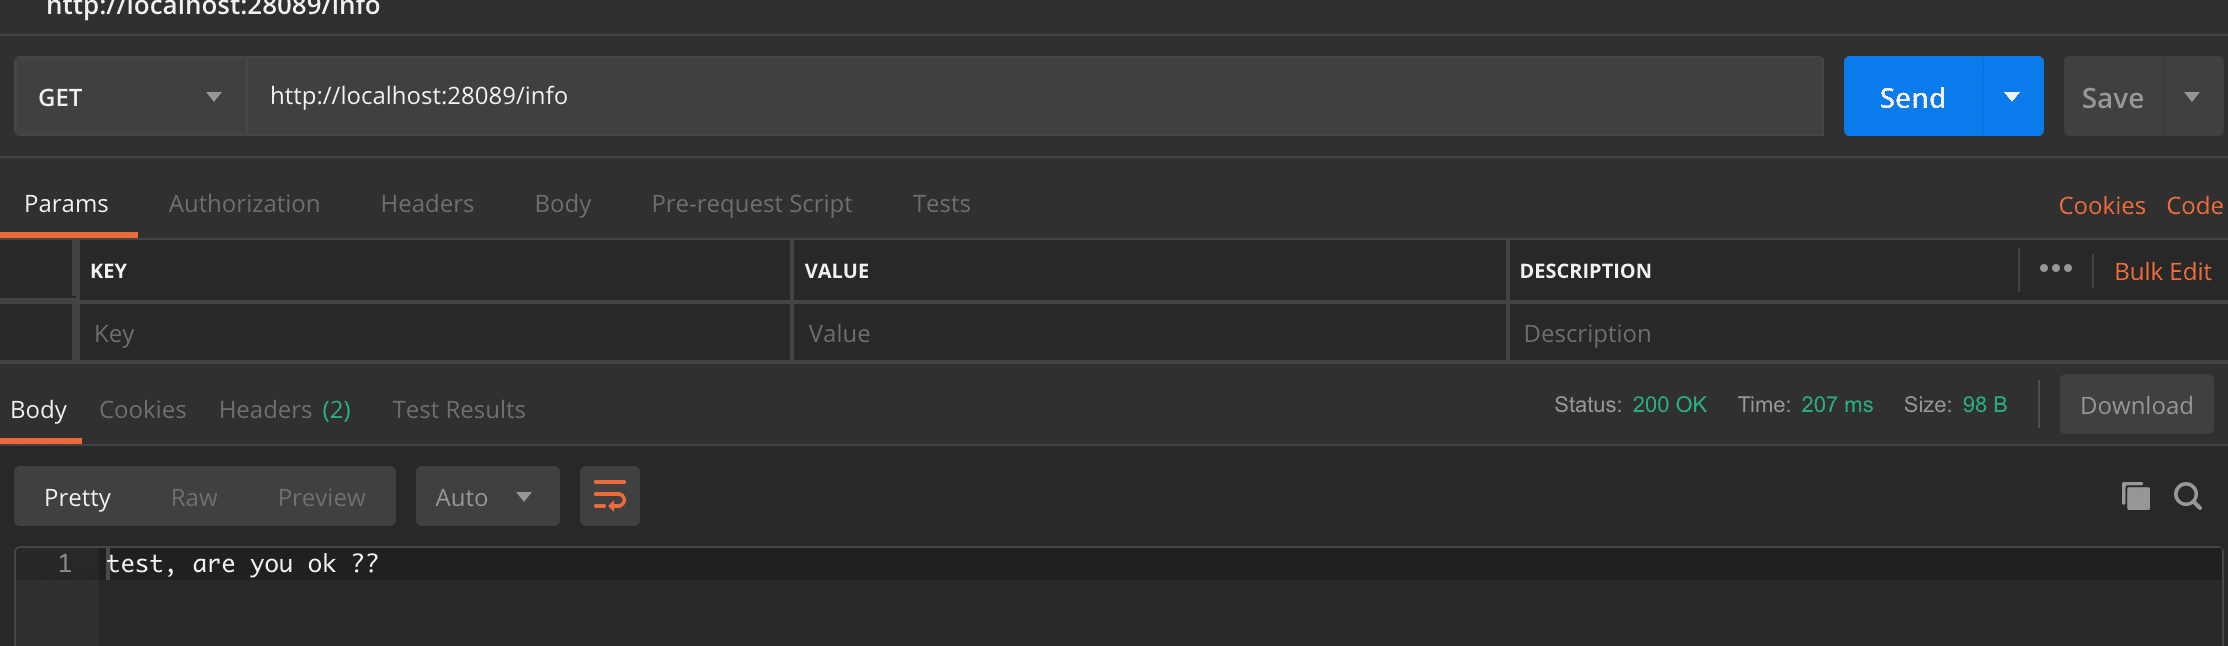
在postman请求http://localhost:28089/info,得到结果如下,说明改造成功:
高可用
启动两个 Server 端,端口分别为 28088 和 28090,提供高可用的 Server 端支持。这样在其中一个Server挂掉的时候,还有另一个Server可以继续提供服务。
具体实施:
打包 |
分别使用postman去请求两个端口的服务端,都能正确返回配置信息,说明高可用集成成功。