在SpringCloud(Git版配置中心) 中有提到过,如果需要客户端获取到最新的配置信息需要执行refresh,我们可以利用webhook的机制每次提交代码发送请求来刷新客户端,当客户端越来越多的时候,需要每个客户端都执行一遍,这种方案就不太适合了。使用Spring Cloud Bus可以完美解决这一问题。
Spring Cloud Bus Spring cloud bus通过轻量消息代理连接各个分布的节点。这会用在广播状态的变化(例如配置变化)或者其他的消息指令。Spring bus的一个核心思想是通过分布式的启动器对spring boot应用进行扩展,也可以用来建立一个多个应用之间的通信频道。目前唯一实现的方式是用AMQP消息代理作为通道,同样特性的设置(有些取决于通道的设置)在更多通道的文档中。
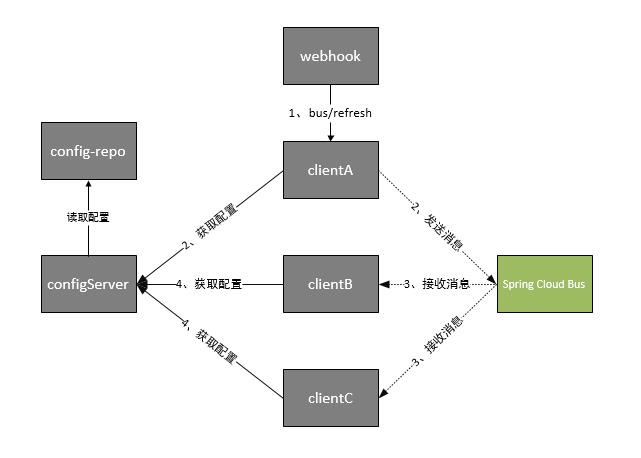
Spring cloud bus可以将它理解为管理和传播所有分布式项目中的消息既可,其实本质是利用了MQ的广播机制在分布式的系统中传播消息,目前常用的有Kafka和RabbitMQ。利用bus的机制可以做很多的事情,其中配置中心客户端刷新就是典型的应用场景之一,我们用一张图来描述bus在配置中心使用的机制。
根据此图我们可以看出利用Spring Cloud Bus做配置更新的步骤:
提交代码触发post给客户端A发送bus/refresh
客户端A接收到请求从Server端更新配置并且发送给Spring Cloud Bus
Spring Cloud bus接到消息并通知给其它客户端其它客户端接收到通知,请求Server端获取最新配置
全部客户端均获取到最新的配置
RabbitMQ 由于需要用到MQ,这里使用Docker安装RabbitMQ来用作示例,Docker教程 。
Docker中使用RabbitMQ RabbitMQ是开源消息代理软件(有时称为面向消息的中间件),它实现了高级消息队列协议(AMQP)。RabbitMQ服务器采用Erlang编程语言编写,构建于Open Telecom Platform框架之上,用于集群和故障转移。与代理接口的客户端库可用于所有主要编程语言。
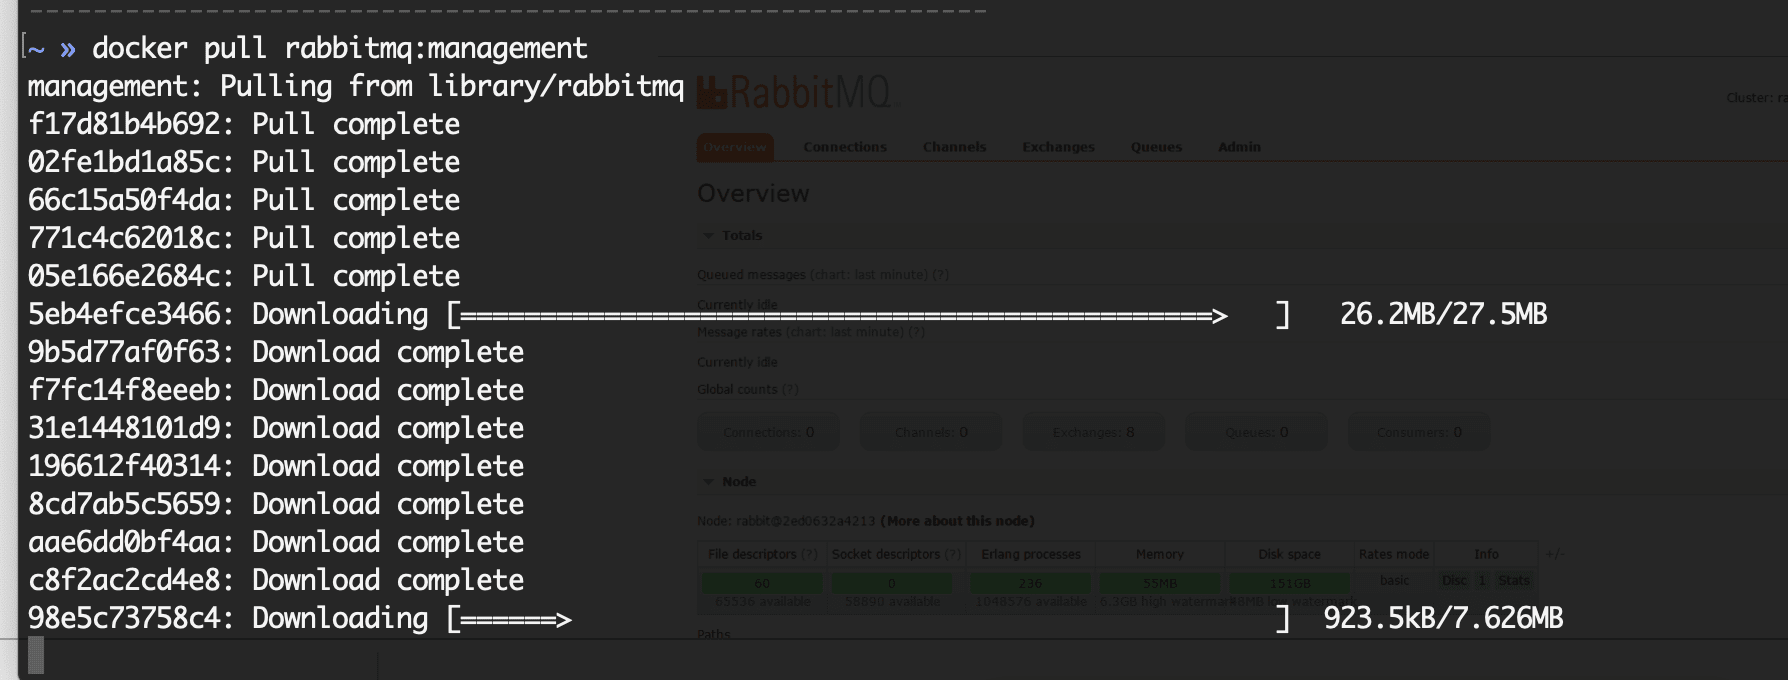
拉取rabbitmq镜像 执行以下命令,拉取latest版官方镜像:
docker pull rabbitmq:management
使用带管理界面的镜像。
使用镜像 执行以下命令,使用镜像:
docker run -d --name rabbitmq --publish 5671:5671 \
 --publish 5672:5672 --publish 4369:4369 \
 --publish 25672:25672 --publish 15671:15671 --publish 15672:15672 \
rabbitmq:management
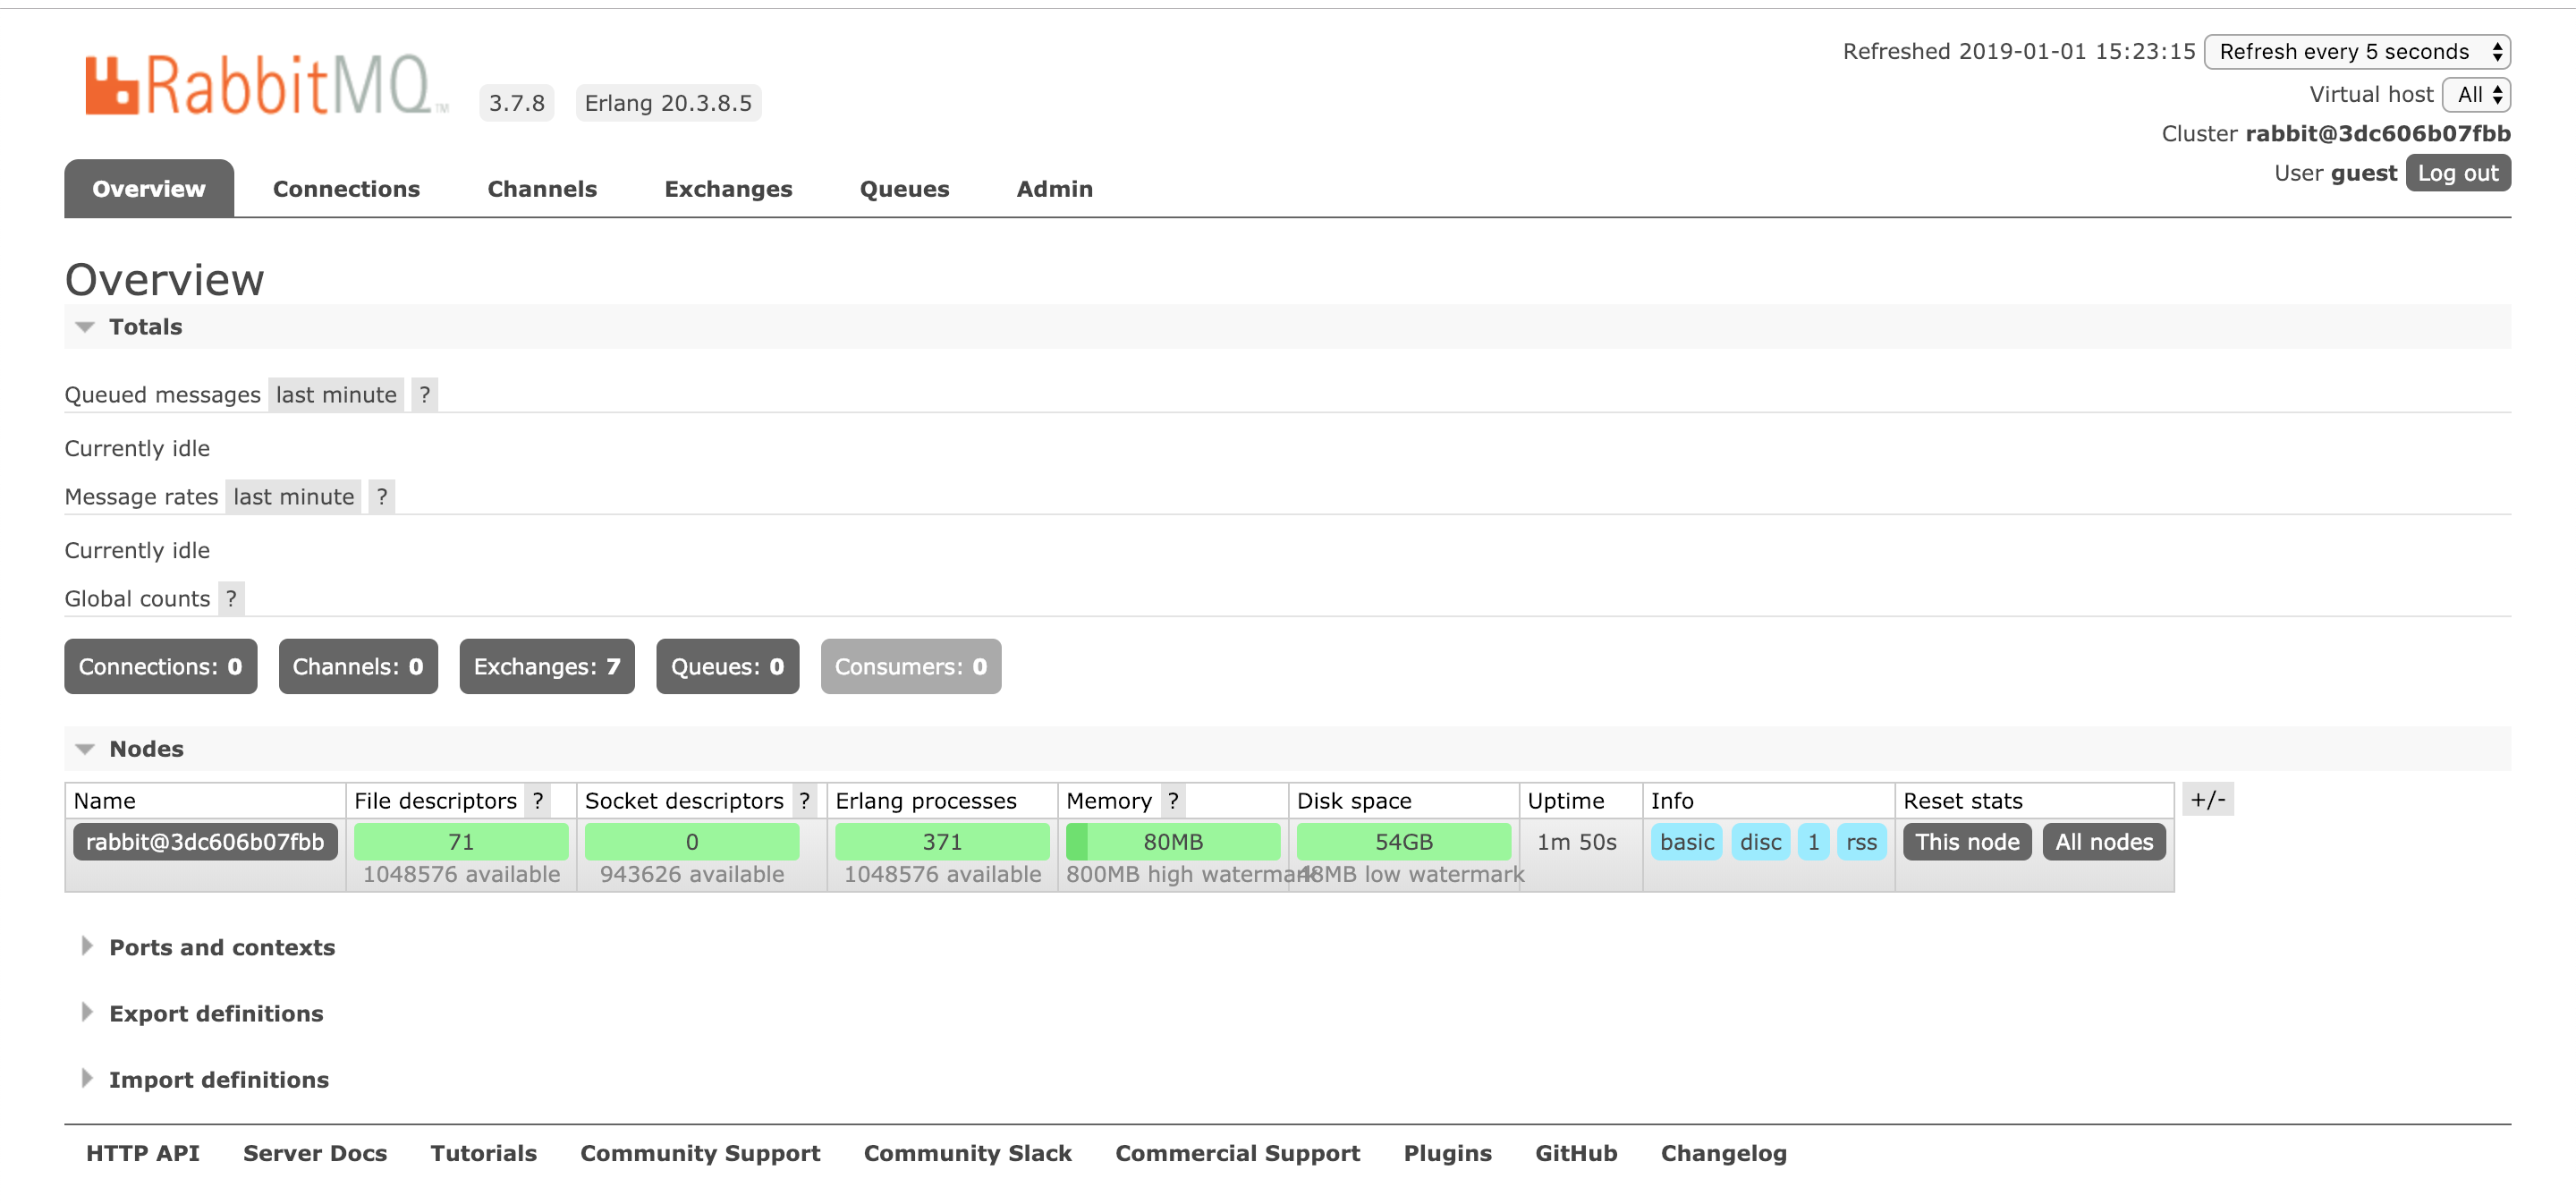
启动之后访问http://localhost:15672/ 能够看到Web管理界面,使用guest / guest 登录之后看到如下界面,说明镜像已经运行。
很好, 现在开始改造代码。
服务端 pom配置 在pom.xml中添加以下依赖:
<dependency > <groupId > org.springframework.cloud</groupId > <artifactId > spring-cloud-config-server</artifactId > </dependency > <dependency > <groupId > org.springframework.cloud</groupId > <artifactId > spring-cloud-starter-netflix-eureka-client</artifactId > </dependency > <dependency > <groupId > org.springframework.cloud</groupId > <artifactId > spring-cloud-bus</artifactId > </dependency > <dependency > <groupId > org.springframework.cloud</groupId > <artifactId > spring-cloud-stream-binder-rabbit</artifactId > </dependency >
以上四个依赖是必须的
配置文件 修改application.yml文件:
spring: application: name: config-server cloud: config: server: git: uri: https://github.com/cayzlh/SpringCloudDemos search-paths: config-repo bus: enabled: true trace: enabled: true server: port: 28088 eureka: client: service-url: defaultZone: http://localhost:28081/eureka/ management: endpoints: web: exposure: include: bus-refresh
主要增加的内容有:
spring.cloud.bus.enable
spring.cloud.bus.trace.enable
Management.endpoints.web.exposure.include
启动类 添加@EnableConfigServer注解:
@EnableDiscoveryClient @EnableConfigServer @SpringBootApplication public class ConfigServerGitApplication { public static void main (String[] args) { SpringApplication.run(ConfigServerGitApplication.class, args); } }
客户端 pom配置 在 pom.xml 里添加以下依赖,前 5 个是必须的,最后一个 webflux 可以用 web 来代替:
<dependency > <groupId > org.springframework.cloud</groupId > <artifactId > spring-cloud-starter-config</artifactId > </dependency > <dependency > <groupId > org.springframework.cloud</groupId > <artifactId > spring-cloud-starter-netflix-eureka-client</artifactId > </dependency > <dependency > <groupId > org.springframework.cloud</groupId > <artifactId > spring-cloud-bus</artifactId > </dependency > <dependency > <groupId > org.springframework.cloud</groupId > <artifactId > spring-cloud-stream-binder-rabbit</artifactId > </dependency > <dependency > <groupId > org.springframework.boot</groupId > <artifactId > spring-boot-starter-actuator</artifactId > </dependency > <dependency > <groupId > org.springframework.boot</groupId > <artifactId > spring-boot-starter-webflux</artifactId > </dependency >
如果缺了spring-boot-starter-actuator,当对服务端执行/actuator/bus-refresh的时候,客户端接收不到信息。
配置文件 有两个配置文件,application.xml:
spring:
  application:
    name: config-client-git
  cloud:
    enabled: true
    bus:
      trace:
        enabled: true
server:
  port: 28089
management:
  endpoints:
    web:
      exposure:
        include: refresh
启用spring cloud bus,bootstrap.xml:
spring:
  cloud:
    config:
      name: test-config
      profile: test
      label: master
      discovery:
        enabled: true
        service-id: config-server
eureka:
  client:
    service-url:
      defaultZone: http://localhost:28081/eureka/
controller 基本上没有啥改动
@RefreshScope @RestController public class HelloController { @Value("${test.hello:error}") private String profile; @GetMapping("/info") public Mono<String> hello () { return Mono.justOrEmpty(profile); } }
@RefreshScope注解必须加上,否则客户端会受到服务端的更新消息,但是更新不了,因为不知道更新哪里的。
启动类 默认的就可以
@EnableDiscoveryClient @SpringBootApplication public class ConfitClientApplication { public static void main (String[] args) { SpringApplication.run(ConfitClientApplication.class, args); } }
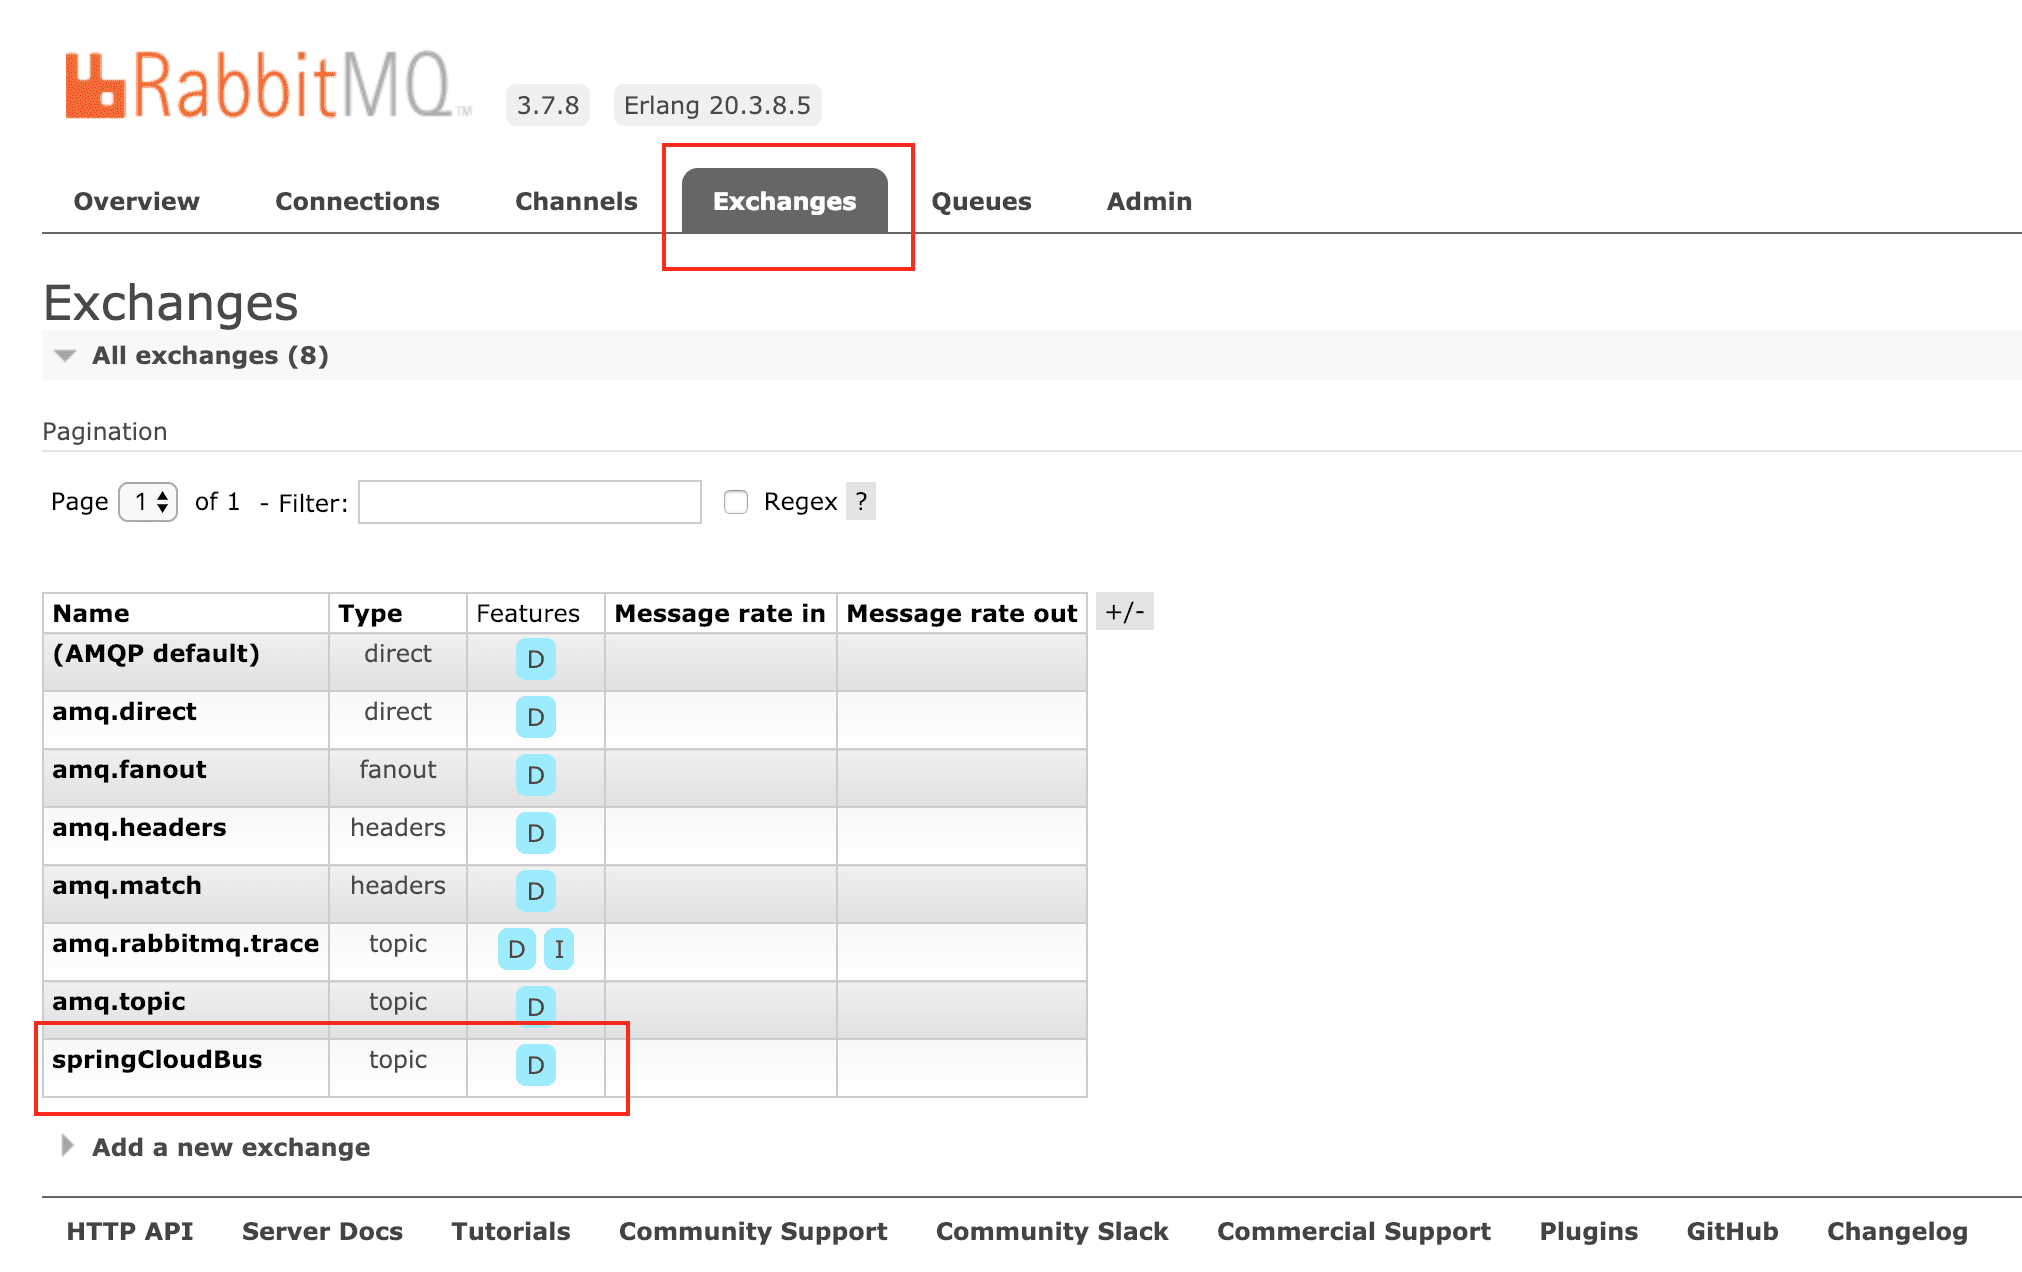
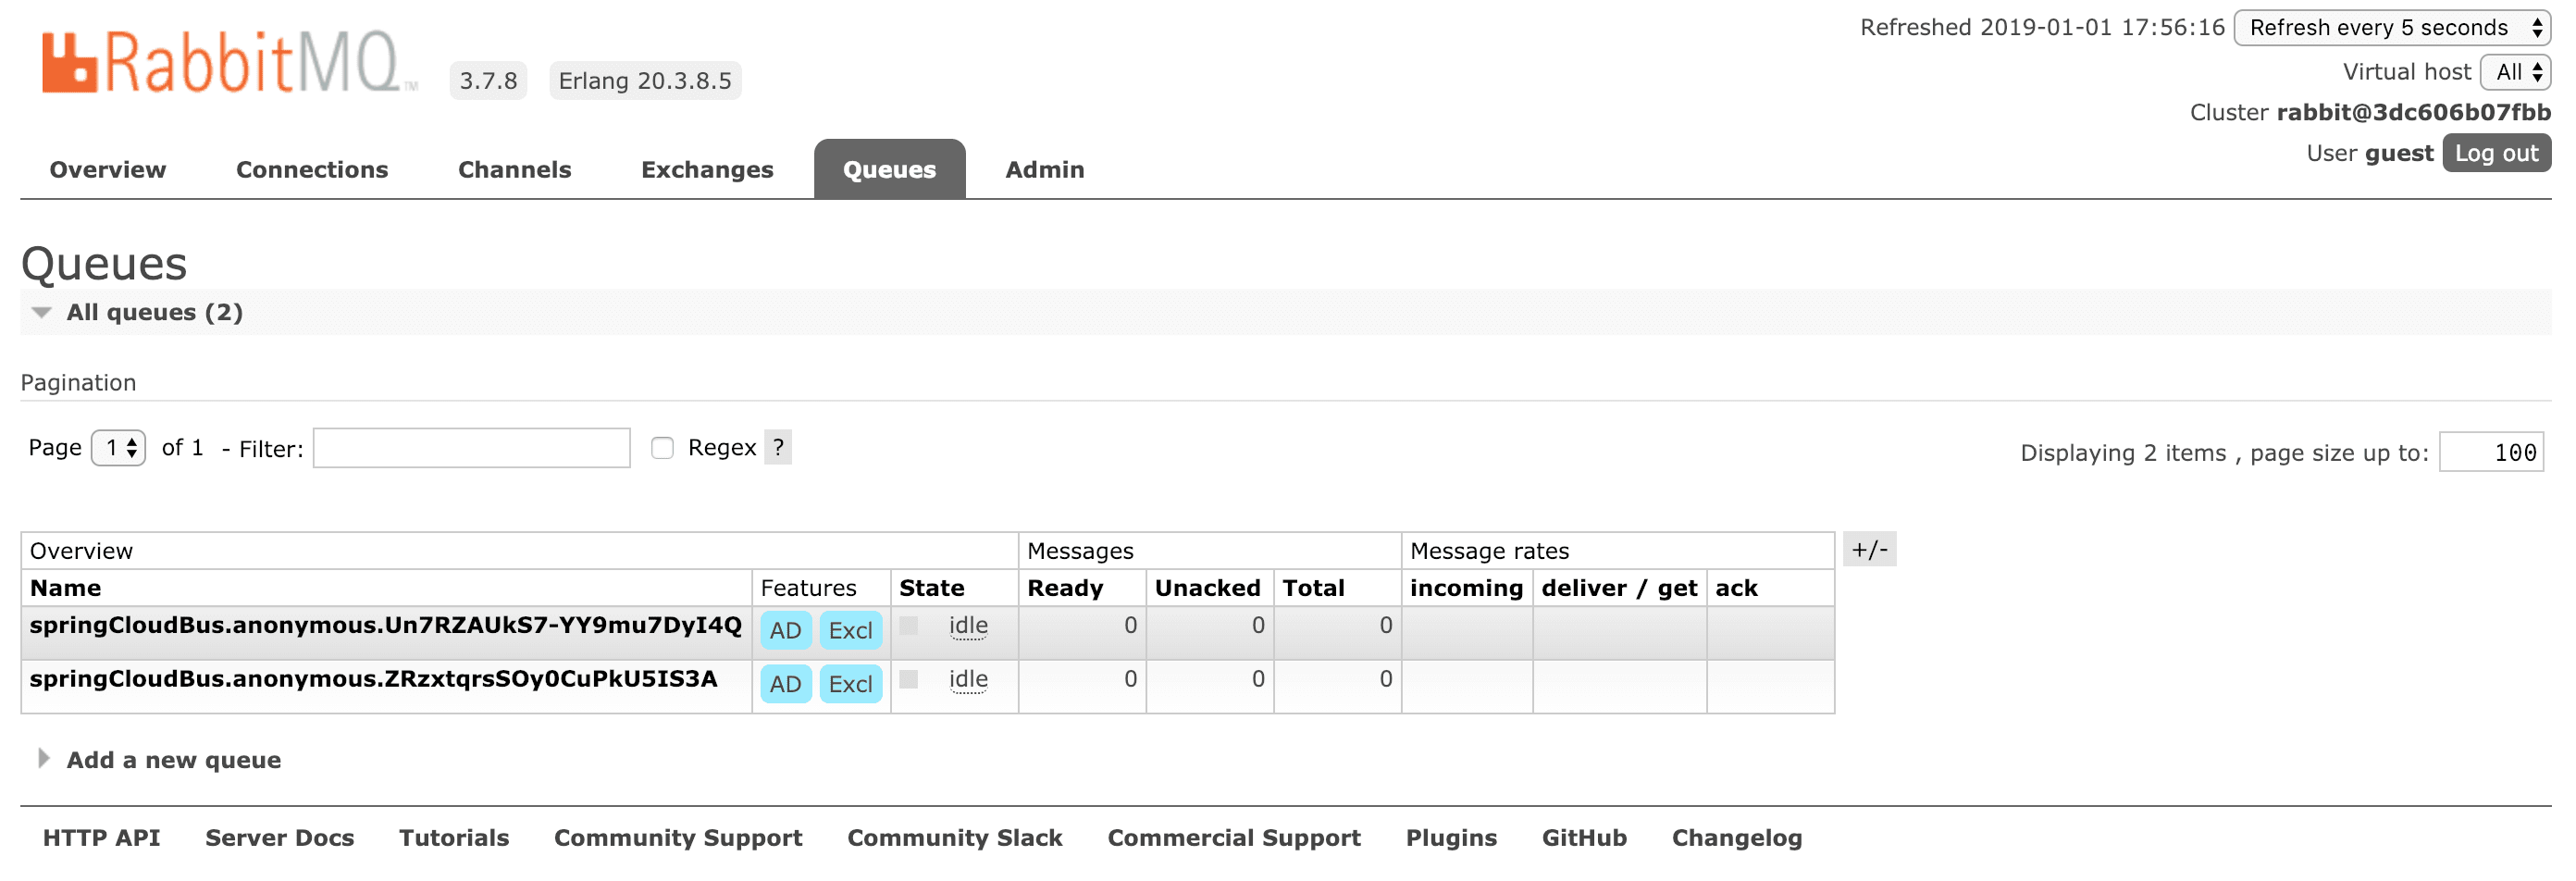
测试 分别启动注册中心、config-server-git、config-client(其中client分别用不同端口启动两个以上实例,用以模拟多个客户端),启动后,RabbitMQ 中会自动创建一个 topic 类型的 Exchange 和两个以springCloudBus.anonymous.开头的匿名 Queue:
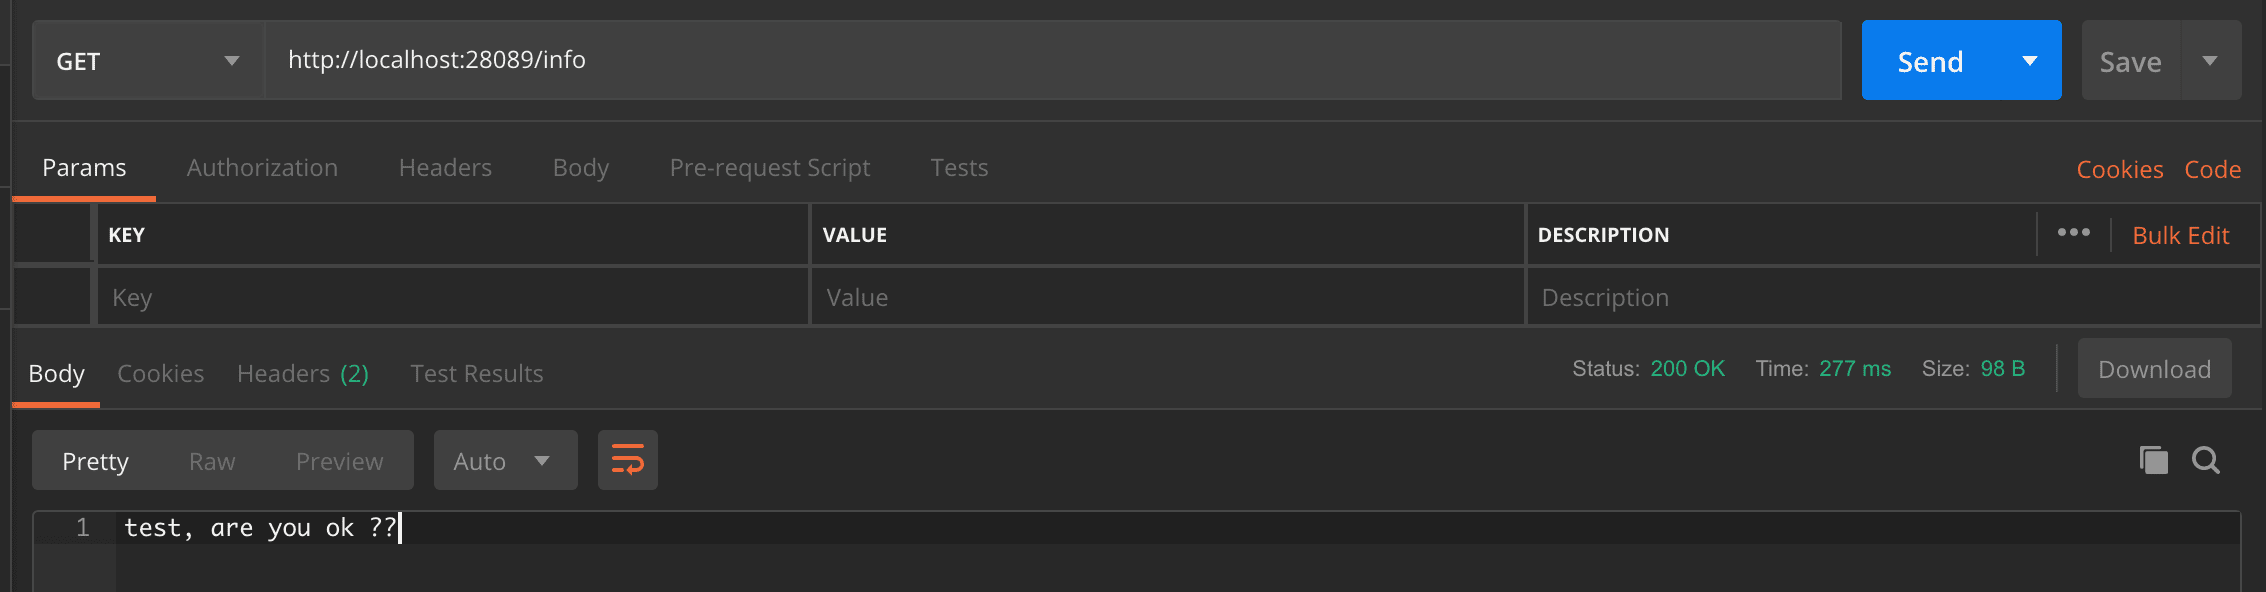
使用postman请求http://localhost:28089/info ,得到结果(各个端口的客户端接口都请求):
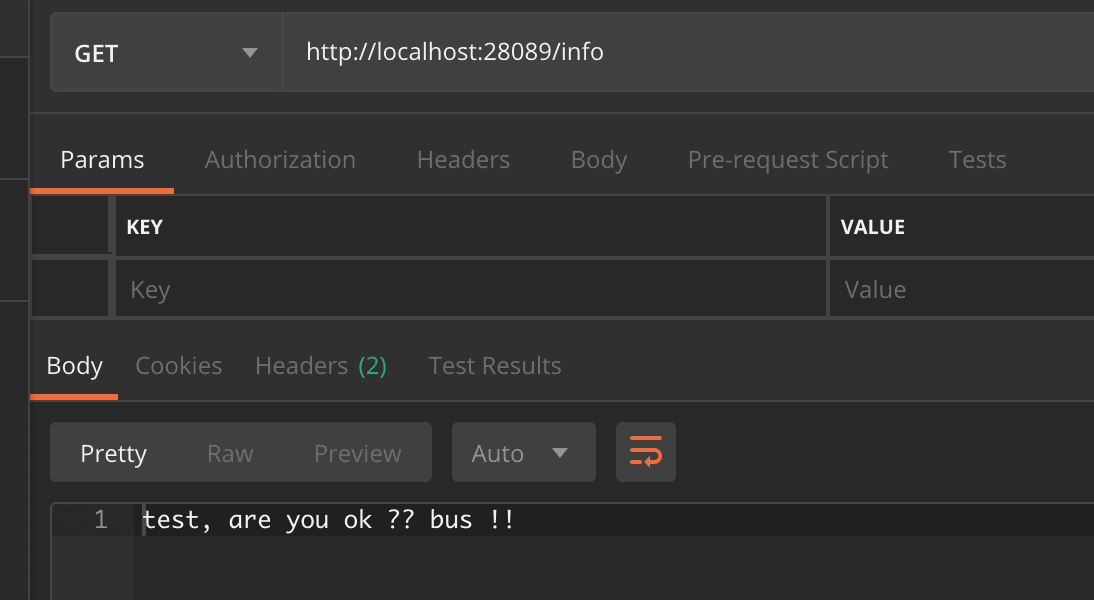
修改test-config-test.yml,将里面的内容改成:
test:
  hello: test, are you ok ?? bus !!
将其push到GitHub,在终端执行以下命令:
curl -X POST http://localhost:28088/actuator/bus-refresh/
再次请求两个客户端的http://localhost:28089/info 接口,都能 得到如下结果,说明成功了:
只要开启 Spring Cloud Bus 后,不管是对 config-server 还是 config-client 执行/actuator/bus-refresh都是可以更新配置的。
其他 当使用SpringBoot-2.1.1.RELEASE的时候,启动的时候会报错以下错误:
Failed to introspect Class \[org.springframework.cloud.stream.config.BindingServiceConfiguration] from ClassLoader \[sun.misc.Launcher$AppClassLoader@18b4aac2]
这个留着以后研究。。
参考